背景说明
网上有很多教程,写的都是从零搭建一个什么什么,基本上都是从无到有的教程,但是,很少有文章提及搭建好之后如何备份,我觉得备份才是一个系统生命周期内永恒的主题,是一个值得花时间严肃对待的问题。
本文尝试总结一些通用的备份脚本,并且把备份文件上传至对象存储,来完成备份任务,应该能覆盖90%的使用场景了。
脚本通过请教GitHub Copilot Chat,生成几个备份脚本,体验下最近大火的AIGC能力。
对象存储这里选择腾讯云的COS,主要是习惯了,平时用得比较多。
注:本文涉及的所有脚本默认仅针对Linux环境。
备份MySQL
#!/bin/bash

# Set the database name, backup directory, host, username, and password
database="<database>"
backup_directory="<backup_directory>"
host="<host>"
username="<username>"
password="<password>"

# Create the backup directory if it doesn't exist
mkdir -p $backup_directory

# Create a timestamped backup file name
backup_file="$backup_directory/$database-$(date +%Y-%m-%d-%H-%M-%S).sql"

# Backup the database to the backup file
mysqldump -h $host -u $username -p$password $database > $backup_file

# Delete backups older than 7 days
find $backup_directory -type f -name "$database-*.sql" -mtime +7 -delete

echo $backup_file
备份SQLite
#!/bin/bash

# Set the database file path and backup directory
database="<database>"
backup_directory="<backup_directory>"

# Create the backup directory if it doesn't exist
mkdir -p $backup_directory

# Create a timestamped backup file name
backup_file="$backup_directory/$(basename $database)-$(date +%Y-%m-%d-%H-%M-%S).db"

# Backup the database to the backup file using SQLite's .backup command
sqlite3 $database ".backup $backup_file"

# Delete backups older than 7 days
find $backup_directory -type f -name "*.db" -mtime +7 -delete

echo $backup_file
备份目录
#!/bin/bash

# Set the directory to backup and backup directory
directory="<directory>"
backup_directory="<backup_directory>"

# Create the backup directory if it doesn't exist
mkdir -p $backup_directory

# Create a timestamped backup file name
backup_file="$backup_directory/$(basename $directory)-$(date +%Y-%m-%d-%H-%M-%S).tar.gz"

# Backup the directory to the backup file
tar -czf $backup_file $directory

# Delete backups older than 7 days
find $backup_directory -type f -name "*.tar.gz" -mtime +7 -delete

echo $backup_file
上传至对象存储
#!/bin/bash

read file

prefix=$1
bucket=$2

coscli cp $file "cos://$bucket/$prefix/$(basename $file)"
COSCLI 是腾讯云对象存储(Cloud Object Storage,COS)提供的客户端命令行工具。具体安装、配置参考官方文档。
划重点
上面的内容都平平无奇,我主要想说的是最后这一段。
上文中的备份脚本有个细节,最后都会输出备份文件的路径,结合最后一个脚本上传至对象存储。
整体使用逻辑是:备份脚本分别写,上传脚本共用同一个。
这里测试备份 /data/test/目录至对象存储的/test/路径下:
backup.sh
#!/bin/bash

directory="/data/test"
backup_directory="/data/backup/test"
mkdir -p $backup_directory
backup_file="$backup_directory/$(basename $directory)-$(date +%Y-%m-%d-%H-%M-%S).tar.gz"
cd $directory
tar -czf $backup_file .
find $backup_directory -type f -name "*.tar.gz" -mtime +7 -delete
echo $backup_file
upload.sh
#!/bin/bash

read file

prefix=$1
bucket=$2

coscli cp $file "cos://$bucket/$prefix/$(basename $file)"
备份命令如下:
./backup.sh | ./upload.sh test temp结合crontab就可以实现定时备份了。
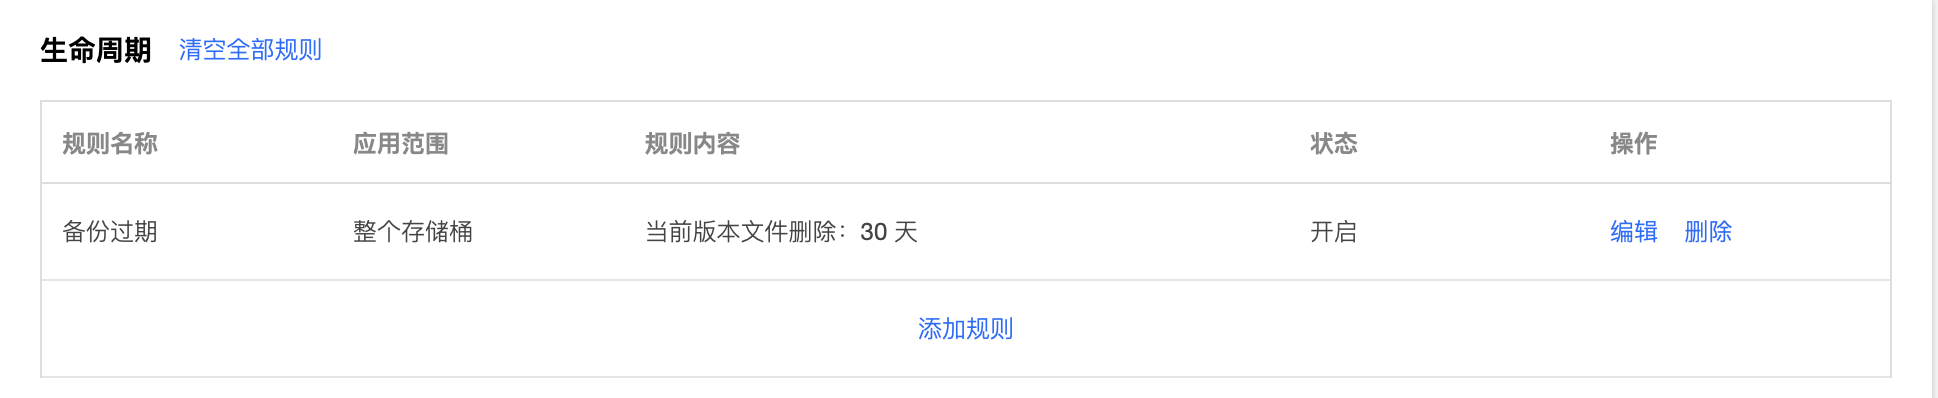
另外,对于对象存储上的内容,可以设置生命周期,自动删除旧的备份。如下图(腾讯云的对象存储为例),设置了备份保留30天。